Description
Included with every Headphones (Full Kit)
3D-printed parts
- 2x Driver Back
- 2x Driver Inner Ring
- 2x Driver Outer Ring
- 2x Driver Cap
- 2x Driver Holder
- Driver Assembly Jig
- 2x Headband Slider
- 2x Headband Slider Cap
- 2x Ear Cup Outer Ring
- 2x Resonator
- 2x Ear Cup Inner Ring
- 2x Ear Cup Base
- 2x Headband Plug
- 4x Headband Plug Tensioner
- 2x Headband Flexbar, Loose
- 2x Headband Flexbar, Tight
- 2x Headband Cap
- Amplifier Case Top
- Amplifier Case Bottom
Electronics
- Amplifier, programmed and tested
Hardware
- 2x Driver Flex Boards
- 2x TRRS connectors
- 3/4” tape strip (>12” long)
- 1/4” tape strip (>3” long)
- 28x little screw
- 12x big screw
- 8x M3x12mm metal dowels
- 2x magnet, red
- 11x magnet, unmarked
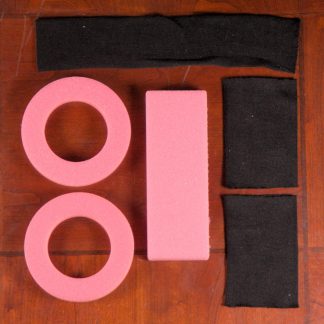
- 2x Driver Foam
- 2x Ear Cup Foam
- Headband Foam
- 2x 3” stockinette, 4.5” long
- 2” Stockinette, 10.75” long
- 2x felt strips
- TRS Cable Y-Splitter
- 2x TRS Cable
- Wire Wrapper
- 3x logo
- USB-A to USB-C cable
You can find full assembly instructions on our Github wiki. The documentation also includes how to change the EQ of the DAC, how we measure frequency response, and many other things.
Assembly
To complete the assembly, you’ll need:
- A Phillips head screwdriver (#1 or similar size)
- A soldering iron
- Solder
- Tweezers
- A glue stick
- Scissors
If you do not have these tools, you will not be able to complete the assembly process.
We recommend watching this video about soldering prior to starting the soldering work necessary to assemble this kit. It correctly shows how to avoid common issues like cold joints, excessive or not enough solder, and how and when to use flux. We also recommend watching this video about desoldering, which provides additional educational background on the desoldering process.
This kit requires a significant amount of electronics assembly expertise to assemble correctly. If your device is non-functioning as a result of inadequate assembly, we cannot provide warranty service to you. For more information, please see our warranty, as well as this primer on our warranty and testing processes.
Headphones Signal Chain
The Ploopy Headphones signal chain is as follows:
- The Ploopy Headphones are plugged into the Amplifier board via TRS cable.
- The Amplifier board provides signal amplification and on-board EQ.
- The Amplifier is plugged into a computer via USB. USB provides power to the Amplifier board and Headphones, as well as the digital audio signal.
Note that the Ploopy Headphones are not particularly portable, as they require a large amount of power. Plugging them into a mobile device will likely drain the device’s battery quickly.
We STRONGLY recommend that you do not plug other headphones into the Ploopy Headphones amplifier. The Ploopy Headphones amplifier board is specifically designed to operate with the Ploopy Headphones. You should consider it as part of the headphones, not part of your signal chain. There is a significant chance you will damage other equipment if you interface it with the Ploopy Headphones amplifier board.
Firmware and Tuning
Want to load new firmware onto your Ploopy Headphones amplifier board? Loading new firmware is fast and easy, and doesn’t require anything except your computer and a paper clip (or tweezers, wire, or something metal and thin). Check out our guide on loading new firmware here.
Tuning the EQ on the Ploopy Headphones is fast and easy. The Headphones Toolbox is a powerful, open-source GUI created by George Norton that can be used to quickly and easily shape the sound of the Headphones. We highly recommend it.
Frequency Response
We publish a frequency response of the Ploopy Headphones measured by us across a representative sample of units. These units were all built by us, using our manufacturing methods and quality control processes. Your kit assembly process may differ from ours, by accident or on purpose. For that reason, we can’t guarantee the frequency response of any Headphones built from a kit.
We personally believe that following the instructions exactly will result in a pair of Headphones that matches our published frequency response. However, if your Headphones don’t match the published frequency response, we unfortunately won’t consider that a valid reason for a warranty claim.
Volume
The maximum volume of the Headphones is one that we consider to be adequate and safe for extended listening. However, we have received feedback that these Headphones are not particularly loud. If you listen to your Headphones at what may be considered a loud volume, these Headphones likely will not deliver the volume that you require.
Modding
Planning on modifying your device? Read through the official Modder’s Guide first for helpful tips!
Checkout page not working?
Sometimes, ad-blocking software will interfere with the checkout process. It’ll result in the checkout page hanging forever after you’ve entered your payment information. If this is happening to you, try temporarily disabling your ad-blockers.